EN
EN  ES
ES PT
PT SV
SV DE
DE TR
TR FR
FR RU
RU VN
VN ID
ID UZ
UZ MX
MX IN
IN
There are many methods for cleaning the extruder, and the following can usually be used:
Resin cleaning method
This method is to use resin, such as polyester resin or epoxy resin to clean the machine (professional cleaning resin is more recommended). This method is generally used when cleaning the new equipment or after the extruder has been used for a period of time. Due to part of the material remaining on the screw or barrel and gelatinization, the material extrusion speed slows down, and the color difference of the color-changing varieties is large. this method can be used. After resin cleaning, use the resin to be produced, add appropriate external lubrication and calcium powder to further clean the machine. When the extrudate is deemed clean, it can be officially put into production.
Non-resin cleaning method

This method uses rice, corn, sawdust, toilet paper and other substances that have a certain friction and are easy to crush. After the extruder is heated to the normal extrusion temperature, the friction between these substances and the screw and barrel is used to remove them. Resin gel attached to the surface of the screw and barrel. Experience shows that the shell of rice has high hardness and high friction. In comparison, the cleaning effect is ideal. After cleaning the machine in this way, it is necessary to open the screw barrel to check the cleaning situation. Under normal circumstances, it is necessary to use the resin cleaning material formula according to the above method to clean the machine again before formal product production can be carried out.
Manual cleaning method for disassembling screw and barrel
This method is to heat the extruder to the working temperature and then push the screw out manually or automatically to remove the materials while it is hot. After cooling, soak it in an organic solvent tank filled with acetone or cyclohexanone. When the molten attachments attached to the screw swell , remove the attachments manually. The soaking time of the screw depends on the amount of attachment and the thickness of the gel. In order to use less solvent and facilitate the sealing of the container, use a steel pipe or stainless steel pipe slightly larger than the diameter of the screw, and weld the seal on one end to use it as a soaking tank. For safety reasons, the container for soaking the screw must be stored in a cool place away from fire and power sources. The mouth should be sealed to prevent solvent evaporation, and a safety mark should be affixed.
If it is necessary to completely clean the machine, the screw barrel can also be opened while it is hot, and the gel attached to the inner wall of the screw barrel can be removed manually or by rubbing with solvent.
In order not to damage the surface finish of the screw and barrel, do not hit it with anything too hard. You can only use a steel saw blade or copper brush that is softer than the steel of the screw and barrel to remove attachments to avoid damaging the screw and barrel. Because when the formula material in the extruder stays for a long time, it is easy to plasticize the gel and the extruder cannot be started. The amount of resin added is to ensure that all the powder coating materials remaining inside can be pushed out of the screw barrel. In terms of the materials cleaning, the standard is that the color of the original product cannot be seen or there is no paste.

When starting up production with an extruder
Premixed materials are used to push out the materials remaining in the extruder according to strict procedures. Only when the push-out is confirmed to be clean, can the re-extruded materials be used as official products.
When the extruder suddenly loses power during normal operation
If the material inside the extruder barrel is not discharged in time, the gel plastic will enter a viscous flow state, causing the machine to fail to start. Tools such as electric heating or a gas welding gun are required. Heating the materials in the extruder barrel at high temperatures can easily damage the equipment. Therefore, after a power outage, the host switch of the extruder should be turned off immediately, and the extruder motor should be manually turned with a handwheel belt or a rocker, to discharge the material inside the extruder as much as possible, to minimize the residue in the screw barrel.
The main motor of some extruders is directly connected to the gearbox
And there is no device to rotate the motor with a rocker, the cooling water in the cooling system can also be increased to quickly cool down the temperature of the extruder barrel and screw to prevent the extrusion from occurring during the extrusion process. The materials coming out of the machine are plasticized, viscous, and aged.
Next are the specific cleaning tools and preparation steps:
1. Choose the correct heating device
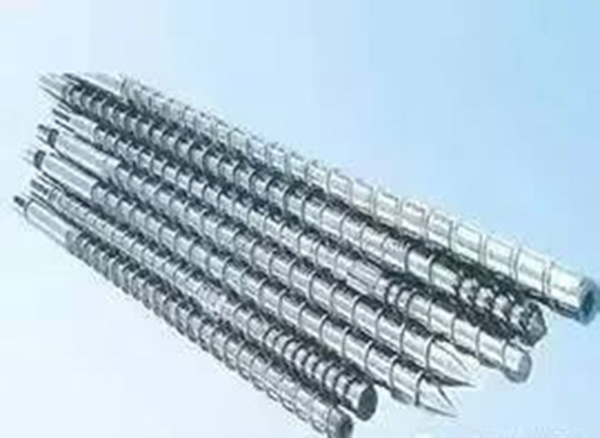
Using fire or roasting to remove plastic fixed on the screw is the most common and most effective method for plastic processing, but acetylene flame must not be used to clean the screw. The temperature of acetylene flame can reach 3000°C. Using acetylene flame to clean the screw will not only destroy the metal properties of the screw, but also significantly affect the mechanical tolerance of the screw.
If the acetylene flame changes to a persistent blue color when baking a certain part of the screw, it means that the metal structure of this part of the screw has changed, which will lead to a reduction in the wear resistance of this part, and even the occurrence of a breakdown between the anti-wear layer and the matrix. metal peeling. In addition, the use of local heating with an acetylene flame will also cause overheating on one side of the screw, causing the screw to bend. Most screws are made of 4140.HT steel, and the tolerances are very tight, generally within 0.03mm.
The straightness of the screw is mostly within 0.01mm. When the screw is baked and cooled by the acetylene flame, it is usually difficult to return to the original straightness. Correct and effective method: Use a blowtorch to clean the screw immediately after use. Because the screw carries heat from the processing process at this time, the heat distribution of the screw is still uniform.
2. Choose the right cleaning agent
Today, with a highly developed commodity economy, there is no shortage of various screw cleaners (screw cleaning materials) on the market, most of which are expensive and have varying effects. Whether to use commercial cleaners depends on different manufacturers and production conditions; plastic processing companies can also use different resins to make screw cleaning materials according to their own production conditions, which can save the unit a lot of money.
3. Choose the correct cleaning method
The first step to clean the screw is to close the feeding insert plate, that is close the feeding port at the bottom of the hopper; then reduce the screw speed to 15-25r/min, and maintain this speed until the melt flow at the front end of the die stops flowing. The temperature of all heating zones should be set at 200°C. Once the barrel reaches this temperature, start cleaning immediately.
Depending on the extrusion process (it may be necessary to remove the die head to reduce the risk of excessive pressure at the front end of the extruder), cleaning must be done by one person: the operator observes the screw speed and torque from the control panel, and at the same time observes the extruder. to ensure that the system pressure is not too high. During the entire process, the screw speed should be maintained within 20r/min. In low-pressure die applications, do not remove the die for cleaning first. When the extrudate is completely converted from processing resin to cleaning resin, immediately stop the machine and remove the die, and then restart the screw (speed within 10r/min) to allow the remaining cleaning resin to flow out.
4. Choose the right cleaning tools
Correct and appropriate tools and cleaning materials should include:
1. Heat-resistant gloves; 2. Goggles; 3. Copper scraper; 4. Copper brush; 5. Copper wire mesh; 6. Stearic acid; 7. Electric drill; 8. Barrel ruler; 9. Cotton cloth.
Once the clean resin has stopped extruding, the screw can be withdrawn from the equipment. For screws with a cooling system, remove the hose lines and swivel connections before starting the screw extraction device (which may be attached to the gearbox). Use a screw extraction device to push the screw forward to expose 4-5 screw blocks for cleaning.
The cleaning resin on the screw can be cleaned with a copper scraper and copper brush. After the cleaning resin on the exposed screw is cleaned, the screw extraction device will be used to advance 4-5 screw blocks and continue cleaning. This is repeated until most of the screw is pushed out of the barrel.
Once most of the cleaning resin has been removed, sprinkle some stearic acid on the screw; then use a copper wire mesh to remove the remaining residue. After the entire screw has been polished by the copper wire mesh, use a cotton cloth for the final step of wiping. This ensures that the screw will not contain any contaminants the next time it is produced. After the screw has been completely cleaned, it can be set aside until other tools have been completely cleaned. If the screw needs to be stored, a layer of grease should be applied to the surface to prevent rust.
Never use steel tools to clean the screw, such as steel screwdrivers, scrapers or pry bars to remove plastic stuck to the screw, as steel will damage the surface of the screw and barrel.
Cleanup steps
Cleaning the barrel is much more convenient and easier than cleaning the screw, but it is also very important.
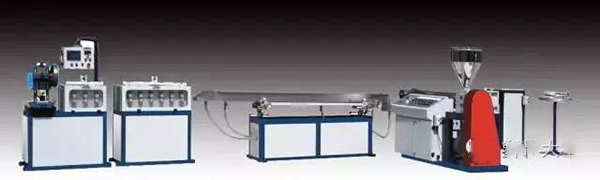
● When preparing to clean the barrel, the barrel temperature is also set at 200°C.
● Screw the round steel brush to the drill pipe and electric drill to form a cleaning tool, and then wrap the steel brush with copper wire mesh.
● Before inserting the cleaning tool into the barrel, sprinkle some stearic acid into the barrel, or sprinkle stearic acid on the copper wire mesh of the cleaning tool;
● After the copper wire mesh enters the barrel, start the electric drill to rotate it, and at the same time artificially move it back and forth until there is no resistance to the back and forth movement;
● After the copper wire mesh is removed from the barrel, use a bunch of cotton cloth to wipe back and forth in the barrel to remove any cleaning resin or fatty acid residue; after several times of wiping back and forth, the cleaning of the barrel is complete. The thoroughly cleaned screw and barrel are ready to be assembled for the next production!
Table of Contents
- Cleanup steps
- Manual cleaning method for disassembling screw and barrel
- Resin cleaning method
- The main motor of some extruders is directly connected to the gearbox
- When starting up production with an extruder
- When the extruder suddenly loses power during normal operation
- Non-resin cleaning method
- Next are the specific cleaning tools and preparation steps:

With nearly 20 years in the intelligent extrusion equipment industry, he has held key roles at Jwell Machinery, including General Manager and Rotating Chairman. Since 2024, he has managed multiple subsidiaries, driving business expansion and industrial upgrades, while leading innovation in intelligent manufacturing and global growth.